SharePoint 2010 State Machine Workflows with Custom Task Forms (InfoPath) using Visual Studio 2010 (Part 1)
How to create Infopath Form for Direct Manager Approve
+using+Visual+Studio+2010+_+01.png)
+using+Visual+Studio+2010+_+02.png)
+using+Visual+Studio+2010+_+03.png)
+using+Visual+Studio+2010+_+04.png)
+using+Visual+Studio+2010+_+05.png)
+using+Visual+Studio+2010+_+06.png)
+using+Visual+Studio+2010+_+07.png)
+using+Visual+Studio+2010+_+08.png)
+using+Visual+Studio+2010+_+08_01.png)
+using+Visual+Studio+2010+_+08_02.png)
+using+Visual+Studio+2010+_+08_03.png)
+using+Visual+Studio+2010+_+08_04.png)
+using+Visual+Studio+2010+_+08_05.png)
+using+Visual+Studio+2010+_+08_06.png)
+using+Visual+Studio+2010+_+08_07.png)
+using+Visual+Studio+2010+_+10.png)
+using+Visual+Studio+2010+_+11.png)
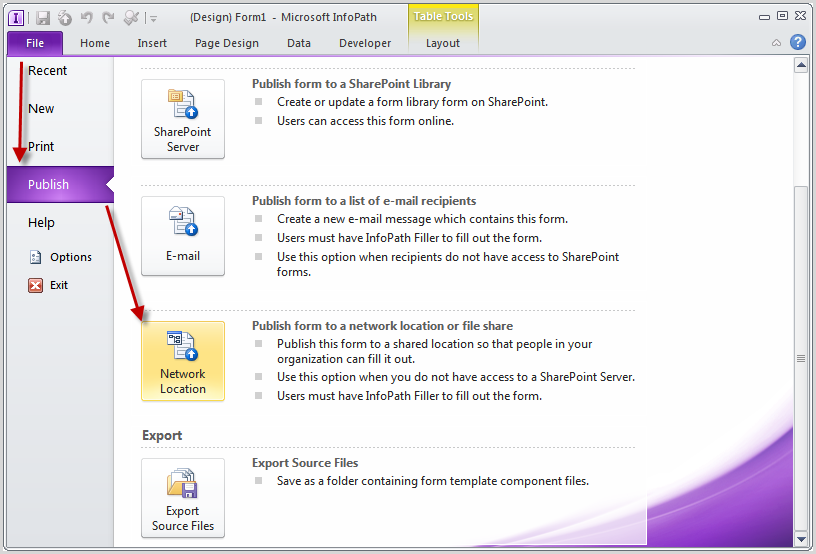
+using+Visual+Studio+2010+_+14.png) File | Publish | Network Location
File | Publish | Network Location
+using+Visual+Studio+2010+_+15.png)
Open Infopath Form Designer
File | New | Blank Form | Design Form
Design UI as follows:
Right click field1 | Text Box Properties…| change Field name is Status
Ads not by this site
Ads not by this site
Right click field2 | Text Box Properties…
Change Field name is
Ads not by this site
Right click to button | Button Properties…
Ads not by this site
Change label: Submit
Ads not by this site
UI after is changed as follows
Click to button Submit | On ribbon choose Add Rule | When this button is clicked | Submit data
Ads not by this site
Ads not by this site
At rule Details Box | Add
At Data Connection Wizard Choose | Create a new connection to: | Submit data then click Next
Choose radio “To the hosting environment , …” then click Next
Ads not by this site
Ads not by this site
Click Finish
Click OK
Rename for this rule is Submit Rule
Ads not by this site
Continue, click to button Submit | On ribbon | Add Rule | When this button is clicked | Close Form (Image 10)
Click OK
Rename for this rule is Close Rule
+using+Visual+Studio+2010+_+12.png)
File | click to Form Options
+using+Visual+Studio+2010+_+13.png)
At Category | Security and Trust | uncheck Automatically determine … | choose Domain (…)
Remember check to “Sign this form template” and click Create Certificate … if have not any certificate
File | Publish | Network Location
Save this template
+using+Visual+Studio+2010+_+16.png)
Continue , click Browse… to publish this template
+using+Visual+Studio+2010+_+17.png)
Save this publish template
+using+Visual+Studio+2010+_+18.png)
Click Next
+using+Visual+Studio+2010+_+19.png)
Clear all text in textbox then click next
+using+Visual+Studio+2010+_+20.png)
Click OK when Warning
+using+Visual+Studio+2010+_+21.png)
Click Publish
+using+Visual+Studio+2010+_+22.png)
Click Close
+using+Visual+Studio+2010+_+23.png)
File | Form Template Properties
+using+Visual+Studio+2010+_+24.png)
Copy ID of Form as follows:
+using+Visual+Studio+2010+_+25.png)
Save this ID to notePad
urn:schemas-microsoft-com:office:infopath:GeneralDirectorAppove:-myXSD-2012-03-23T08-37-10


Comments
Post a Comment